
From what I see, there are a lot of folks asking for help to get Bluetooth working on their laptops and desktops. I figured I’d write a small post to explain how Bluetooth configuration in Linux works and hopefully this will help out a lot of folks.
Most laptops these days come with Bluetooth hardware, there should not be a need to buy Bluetooth hardware separately unless you’re using a desktop computer (although some motherboards do have Bluetooth built-in) or you have really old hardware that does not have Bluetooth.
NOTE: You can purchase Bluetooth modules separately, that would connect to your computer either through a USB or a PCIE port. For this post, I am going to assume, that the Bluetooth hardware exists on your laptop/desktop.
Validate Bluetooth Hardware exists
To see if Bluetooth hardware is present on the laptop and/or desktop, we can run the following command:
1
sudo dmesg | grep -i "bluetooth"
If your system does in fact have the Bluetooth hardware, you should see something similar to this:
1
2
3
4
5
6
7
8
9
10
11
12
13
[    2.116644] Bluetooth: Core ver 2.22
[    2.116660] NET: Registered PF_BLUETOOTH protocol family
[    2.116662] Bluetooth: HCI device and connection manager initialized
[    2.116664] Bluetooth: HCI socket layer initialized
[    2.116666] Bluetooth: L2CAP socket layer initialized
[    2.116669] Bluetooth: SCO socket layer initialized
[    2.248109] Bluetooth: BNEP (Ethernet Emulation) ver 1.3
[    2.248112] Bluetooth: BNEP filters: protocol multicast
[    2.248115] Bluetooth: BNEP socket layer initialized
[    9.398294] hid-generic 0005:1532:0092.000D: input,hidraw12: BLUETOOTH HID v0.01 Mouse [Naga Pro] on b4:0e:de:f9:dd:09
[   10.898205] Bluetooth: RFCOMM TTY layer initialized
[   10.898213] Bluetooth: RFCOMM socket layer initialized
[   10.898215] Bluetooth: RFCOMM ver 1.11
As you can see in the picture above, I do have my Razer Naga Pro mouse connect to my PC over Bluetooth. This should also give you an indication that Bluetooth hardware is present.
Make sure Bluetooth Protocol Stack is installed
Next, in order to use Bluetooth in Linux, we need to install the Bluetooth Protocol stack known as “bluez“. To validate if bluez is already installed, we can issue the following command:
1
pacman -Q | grep "bluez"
This should return something like this:
1
2
bluez 5.62-1
bluez-libs 5.62-1
If you do not see any results, there’s a good chance you don’t have the Bluetooth protocol stack installed, so to fix this, simply use the package manager to install it like this:
1
sudo pacman -S bluez
Enable Bluetooth Service
1
systemctl status bluetooth
This should provide us with an output similar to this:
1
2
3
4
5
6
7
8
9
10
11
12
13
bluetooth.service - Bluetooth service
     Loaded: loaded (/usr/lib/systemd/system/bluetooth.service; enabled; vendor preset: d>
     Active: active (running) since Sun 2021-12-26 12:12:37 EST; 10min ago
       Docs: man:bluetoothd(8)
   Main PID: 809 (bluetoothd)
     Status: "Running"
      Tasks: 1 (limit: 38394)
     Memory: 2.8M
        CPU: 689ms
     CGroup: /system.slice/bluetooth.service
             └─809 /usr/lib/bluetooth/bluetoothd

Dec 26 12:13:27 "machine_name" bluetoothd[809]: Endpoint registered: sender=:1.70 path=/MediaEndpo>
If the service is not started, which by default I noticed it was not, we just have to start the service
1
systemctl start bluetooth
We can also make this service start on boot up so that we dont have to enable it every time. To this, we simply issue the following command:
1
systemctl enable bluetooth
Connect your Bluetooth devices
Once the Bluetooth service has been started, we can enable the Bluetooth functionality in the settings menu, in the case of Gnome, here’s an example:
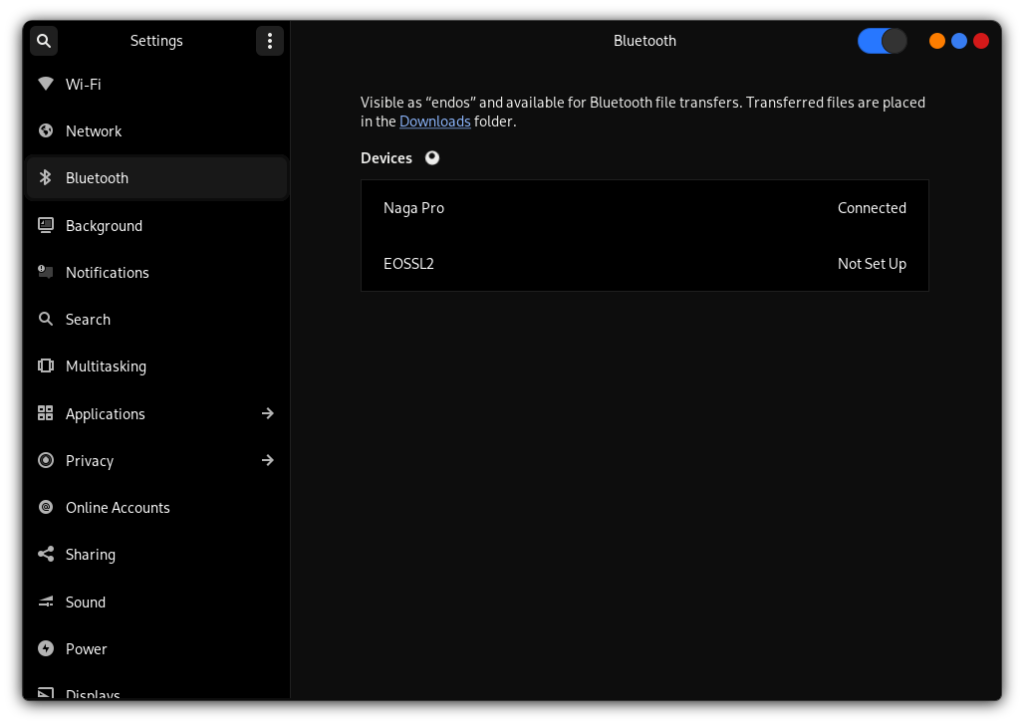
At this point, it is now just a question of pairing your devices together.
Conclusion
As you see from this post, it is quite easy to setup Bluetooth and does not require a lot of effort. There are of course instances where there might be specific issues to to iron out, it might take a bit more effort. But the intention here is to show you that there are a few steps to get this to work, and once you have an understanding of the process, if you do run into issues, you’ll have a better understanding of what specific area to look at to troubleshoot. Either way, feel free to leave any questions you might have if you’re still experiencing issues.